Need help with your Controller?
Please review the below FAQ's and if you need any further support, please contact us at support@gioteck.com or www.gioteck.com/support
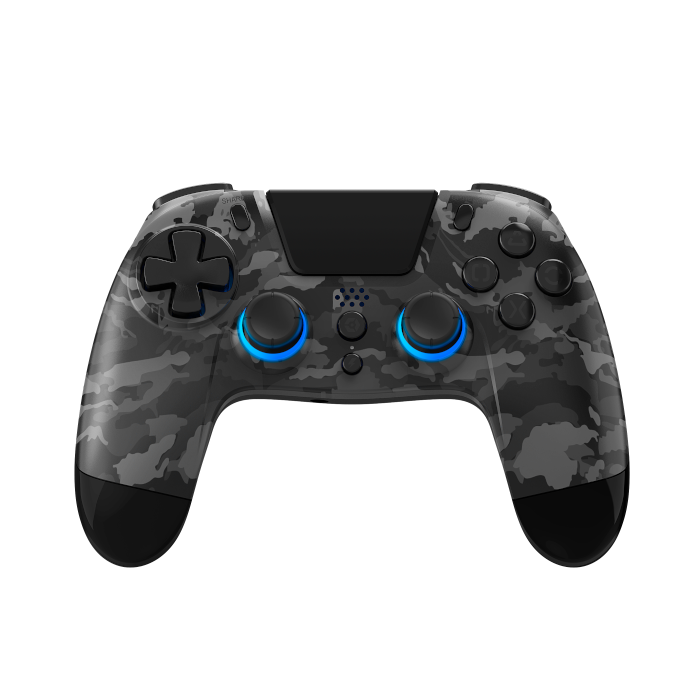
VX4 Controller for PS4
FAQ's for Wired, Wireless and Wireless + options
Full manuals can be found below:
Collapsible content
Connection Issues (PS4)
Please note, if you have factory reset your PS4, then a DualShock will be required to complete setup. Once you have completed initial setup, the VX4 will connect.
- Please ensure you use the cable provided and connect directly into the USB port on your PS4™.
- Press and hold the “home” button for approximately 3 seconds.
- Connection will be made and you will be prompted to “select a user”.
- Once selected your profile or a guest profile, the controller will be connected and ready to use. Simply disconnect the cable for wireless play (VX4 wireless only)
If this fails please press and hold the small “reset” button on the underside of the controller for 3 seconds. This will return the unit to factory settings. Please then retry the above steps.
Connection Issues (PC)
- Connecting to PC via a wired connection is advised. Simply connect via the USB cable provided with “plug and play” support.
- For wireless Bluetooth™ connectivity, (preferred for gameplay within Steam™ software):
- Firstly, open Steam™ in “Big picture mode” and have this loaded in your system tray.
- Navigate to “Bluetooth & devices” in Windows settings.
- Press and hold “home button” & “share” on your controller for 5 seconds until the LED’s repeatedly blink twice. The controller is now in “pairing” mode.
- Select “Add Bluetooth device” on your PC and then select “Bluetooth” from the available drop down. You will see “wireless controller” available in the options. Select this and wait for Windows to setup the device.
- During operation in Steam™, you can press and hold the home button to turn the controller off. When re-connecting, simply load Steam, and press the home button once on the controller. The LED’s will flash and connection will be made.
If this fails, please press and hold the small “reset” button on the underside of the controller for 3 seconds. This will return the unit to factory settings. Please retry the above steps.
The VX4 will connect to the PC in XInput mode and therefore replicate the Xbox layout. If you would prefer this to retain the PS4 layout, please contact support@gioteck.com for the firmware to change this.
Audio Issues
1. There is no audio through my headphones via the Aux port (for VX4 with Audio Port only)
- Please ensure 3.5mm connector is fully seated in the aux port
- Please navigate to settings on your PS4 console.
- Select device / controller settings.
- Select Audio settings and switch between sound/chat/all for sound through your controller vs your TV.
2. There is no audio through my TV
- Please navigate to settings on your PS4 console.
- Select device / controller settings.
- Select Audio settings and switch between sound/chat/all for sound through your controller vs your TV.
Battery / Charging Issues
1. My controller wont charge
- Please ensure you are charging via the PS4 console or USB port on your PC only. Whilst other adapters/chargers may work, incompatible amperage may be an issue.
- Please ensure your PS4 or PC are connected to mains power
- If your controller still won’t charge, please press and hold the small “reset” button on the underside of the controller for 3 seconds. This will return the unit to factory settings. Please then repeat the above steps.
- Please charge the battery for 3 hours without any use. Once fully charged, please disconnect from power source.
2. My battery won’t hold its charge
- Please press and hold the small “reset” button on the underside of the controller for 3 seconds. This will return the unit to factory settings.
- Please charge the battery for 3 hours without any use. Once fully charged, please disconnect from power source.
"How-to" Guides
Customising your RGB (VX4+ models)
- To customise your RGB effect, please ensure the switch on the rear of the controller is set to 0 and then short press the SET button. Each time you press SET, the RGB will alternate between "colour options" / "RGB" and "Off".
Programming your Back Buttons
- To re-map your back buttons, please ensure the switch on the rear of the controller is set to "M".
- Please press and hold the SET button for 3 seconds, then press the action buttons you wish to map (i.e. X, or multiple action buttons such as Up,Down+ X) then press the rear button you wish to map to.
For detailed "how to" guide, please find Product Manual
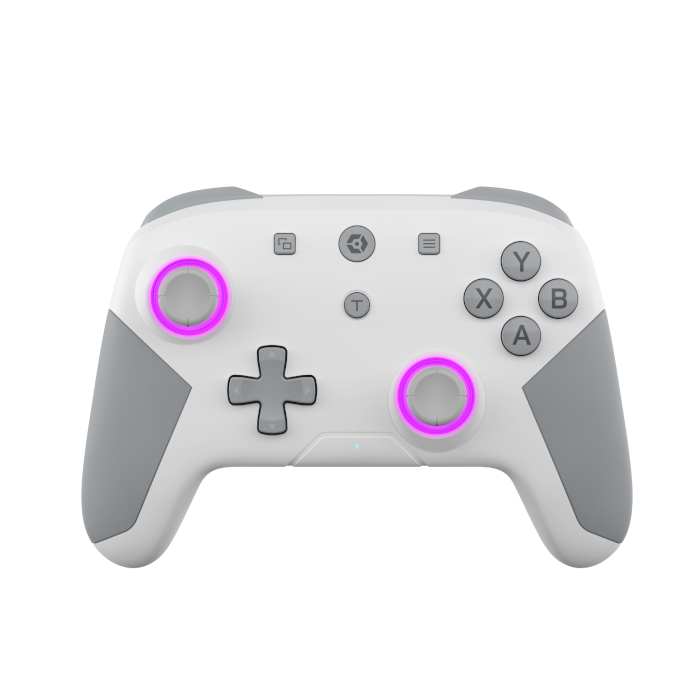
WX4 Controller for Nintendo Switch
FAQ's for Wired, Wireless and Wireless+ options
Full manuals can be found below:
Collapsible content
Connection Issues (Switch)
Wireless setup:
- Navigate to the controller menu in your Switch™ settings.
- Navigate to “change grips/order” menu within the controller menu
- Whilst displaying this screen, press and hold “home” and “Y” for 3 seconds until the LED’s flash indicating the controller is in pairing mode.
- After approximately 10 seconds, the controller will connect to the Switch™
- If the controller fails to connect. Repeat these steps.
- If the controller still fails to connect, please follow below additional steps, followed by the original steps.
- Navigate to Settings > Controllers Settings > Disconnect all Controllers
Wired setup:
- Plug the cable provided into your Switch™ dock ensuring the dock has mains power
- Connect the controller
- The Switch™ will automatically detect the controller and connect.
- You can now remove the cable from the controller and continue to connect wirelessly (providing controller has sufficient power)
- If your controller still fails to connect, please press and hold the small “reset” button on the back of the controller for 3 seconds. Repeat the above two steps.
Connection Issues (PC)
Connecting to PC via a wired connection is advised. Simply connect via the USB cable provided with “plug and play” support.
For wireless Bluetooth™ connectivity, (designed for gameplay within Steam™ software).
- Firstly, open Steam in “Big picture mode” and have this loaded in your system tray.
- Navigate to “Bluetooth & devices” in Windows settings.
- Press and hold “home button” & “Y” on your controller for 5 seconds until the LED’s repeatedly flash. The controller is now in “pairing” mode.
- Select “Add Bluetooth device” on your PC and then select “Bluetooth” from the available drop down. You will see “Pro Controller” available in the options. Select this and wait for Windows to setup the device.
- During operation in Steam, you can press and hold the home button to turn the controller off. When re-connecting, simply load Steam, and press the home button once on the controller. The LED’s will flash and connection will be made.
- Please press and hold the small “reset” button on the underside of the controller for 3 seconds. This will return the unit to factory settings. Please retry the above steps.
- If your controller still fails to connect, please download latest update at www.gioteck.com/firmware ensuring you have selected the correct version. Follow the steps on the website to update the controller to the latest settings.
Battery / Charging Issues
My controller wont charge
- Please ensure you are charging via the Switch™ console or USB port on your PC only. Whilst other adapters/chargers may work, incompatible amperage may be an issue.
- Please ensure your Switch™ or PC are connected to mains power
- If your controller still won’t charge, please press and hold the small “reset” button on the underside of the controller for 3 seconds. This will return the unit to factory settings. Please then repeat the above steps.
- Please charge the battery for 3 hours without any use. Once fully charged, please disconnect from power source.
2. My battery won’t hold its charge
- Please press and hold the small “reset” button on the underside of the controller for 3 seconds. This will return the unit to factory settings.
- Please charge the battery for 3 hours without any use. Once fully charged, please disconnect from power source.
"How-to" Guides
Customising your RGB (WX4+ models)
- To customise your RGB effect, please ensure the switch on the rear of the controller is set to 0 and then short press the SET button. Each time you press SET, the RGB will alternate between "colour options" / "RGB" and "Off".
Programming your Back Buttons
- To re-map your back buttons, please ensure the switch on the rear of the controller is set to "M".
- Please press and hold the SET button for 3 seconds, then press the action buttons you wish to map (i.e. Y, or multiple action buttons such as Up,Down+ Y) then press the rear button you wish to map to.
For detailed "how to" guide, please find Product Manual
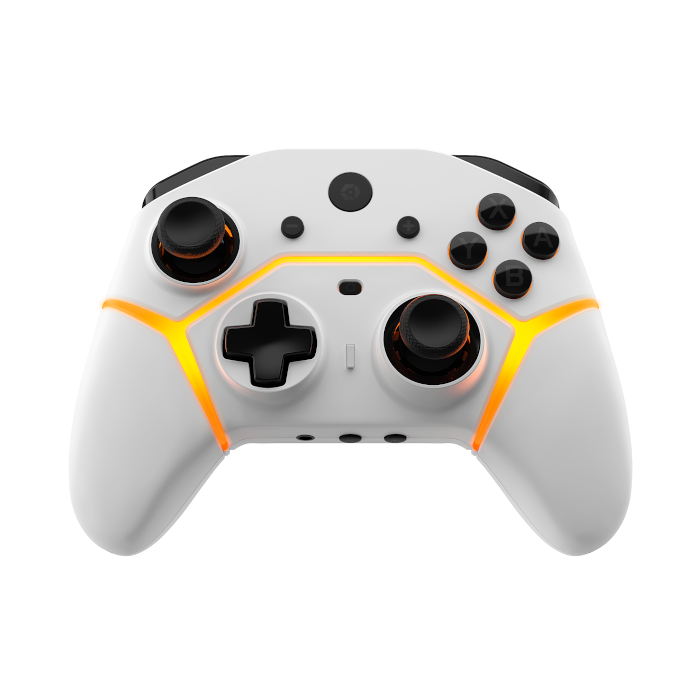
SC3 Pro Controller for Nintendo Switch / PS4 / PC
FAQ's for Nintendo Switch and PS4 options for SC3 Pro
Full manuals can be found below:
Collapsible content
Connection Issues (Switch)
Wireless setup:
- Navigate to the controller menu in your Switch™ settings.
- Navigate to “change grips/order” menu within the controller menu
- Whilst displaying this screen, press and hold the "home” button for 3 seconds until the LED’s flash indicating the controller is in pairing mode.
- After approximately 10 seconds, the controller will connect to the Switch™
NOTE: After the controller is paired to the Switch, it will automatically connect next time.
- If the controller fails to connect. Repeat these steps.
- If the controller still fails to connect, please follow below additional steps, followed by the original steps.
- Navigate to Settings > Controllers Settings > Disconnect all Controllers
Wired setup:
By default, the Switch console has wired communication disabled
- Enable wired communication by going to System Settings > Controllers and Sensors > Pro Controller Wired Communication and set it to On.
- Connect the USB charge cable to the controller and Switch console for USB mode
When you want to use the controller in wireless mode again, disconnect the USB cable from the controller, and press the Home button to wirelessly reconnect.
Connection Issues (PS4)
Please note, if you have factory reset your PS4, then a DualShock will be required to complete setup. Once you have completed initial setup, the SC3 will connect.
- While powered Off, connect controller via USB cable to the console and pairing mode will be initiated after 2 seconds
- Press the Homme button to turn on the controller and to connect to the console
- When the white colour LED illuminates, press the button to select the user channel
- Once connected either use wired or disconnect the USB cable for wireless play
Connection Issues (PC, iOS and Android)
iOS/PC Bluetooth Setup
In this mode, the controller emulates an Xbox wireless controller with the SC3 Switch version, and PS4 wireless controller on the SC3 PS4 version. Please check game support before use.
- With the controller powered off, Press the A button and Home button together for 3 seconds
- The LED bar will flash, and the controller is now in pairing mode
- Select the controller from the list of Bluetooth devices on your iOS device or PC
- After the connection is made, the LED bar will stop flashing and will show a solid light
Android Bluetooth Set Up
- Follow the instructions above but press the Y button and Home button
- The controller will show as "gamepad" in the Bluetooth device list
PC Wired Set Up
- With the USB cable connected to the SC3, connect the other end to the PCC
- The controller will now be recognised as an X-input controller device
- The default LED bar colour for PC USB Wired mode is green
Battery / Charging Issues
My controller wont charge
- Please ensure you are charging via the Switch™ console or USB port on your PC only. Whilst other adapters/chargers may work, incompatible amperage may be an issue.
- Please ensure your Switch™ or PC are connected to mains power
- Please charge the battery for 3 hours without any use. Once fully charged, please disconnect from power source.
2. My battery won’t hold its charge
- Please press and hold the small “reset” button on the underside of the controller for 3 seconds. This will return the unit to factory settings.
- Please charge the battery for 3 hours without any use. Once fully charged, please disconnect from power source.
"How-to" Guides
Understanding the LED Bar
- Low Power: The LED bar blinks red
- Charging: The LED bar blinks orange
- Connected to power and fully charged: The LED bar will turn off
- Pairing mode: When the Home button is pressed, the LED bar flashes white.
- Programming back buttons: When the Program button is pressed, the LED bar flashes white
Customising the RGB
- The default colour of the LED bar is orange
- Press the Program button to cycle through different colour settings
- After the solid colour settings, there is a fast rainbow effect followed by a slower option
- After the LED bar cycles these settings, the last setting is off
- Pressing the Program button again from the off setting will restart the cycle
Programming your Back Buttons
- Press and hold the Program button for 2 seconds, the LED bar will start to flash white
- While LED bar is flashing, press the desired command buttons
- When you have finished, press either S1 or S2 to complete the process
- The controller will vibrate, and the LED bar with reset; The S1 or S2 button is now programmed
Resetting the Back Buttons
- Press and hold Program button for 5 seconds and the controller will vibrate
- All programs are now erased
- The S1 and S2 default mapping is L3 and R3.
Smart TV Controller for Android, iPhone, PC and Cloud Gaming
Collapsible content
Connection Modes and Issues
There are 3 ways to connect the Smart TV controller to devices:
- Wireless mode via 2.4GHz Adapter
- Wireless mode via Bluetooth
- Wired mode via USB cable
Smart TV Connections
Smart TV models and their apps support different connection methods. Some support both Wired USB and Bluetooth Wireless connections while others only support Wired USB.
Connect Using 2.4GHz Wireless
- Set the Mode switch on the back of the controller to 2.4G and plug the included USB Wireless Adapter into an available USB port on your compatible device
- Power on the controller by pressing the Home button
- The controller pairs to the USB Wireless Adapter
- The status LED turns On, not flashing
Connect Using Bluetooth Wireless
It is recommended to remove the USB Wireless Adapter from any device as the controller automatically searches for this connection.
The controller will also automatically reconnect to the most recent Bluetooth device it was connect to. On the Bluetooth device, you can select to disconnect or forget the controller to prioritise other connections.
- Check the controller is Off and set the Mode switch on the back of the controller according to the device you plan to connect to (either iOS, Android or PC)
- Pres and hold the home button to power On the controller and place in into pairing mode; the status LED flashes quickly to indicate pairing mode
- The controller is now discoverable as WIRELESS CONTROLLER on the device that supports Bluetooth
- Follow the on screen instructions on your device to complete the pairing process
- If connecting to a Smart TV app, you may need to select "pair a controller" from within the app itself to display
NOTE: If it takes too long to connect to the device, the controller may exit pairing mode. If this occurs, power Off the controller and repeat step 2 above
Connect Using a USB Cable
- Connect the included USB data cable to the controller and connect the other end to an available USB port on the device
- The controller should automatically connect
NOTE: Connecting the USB cable disconnects wireless connections
Battery Issues
Battery Requirements
- The controller requires 2x AA batteries for Wireless operation
- Alkaline or Rechargeable batteries can be used
- Always use the same brand, chemistry, voltage and size of battery
- Mixing different batteries can result in battery leakage and sub-optimal controller performance
NOTE: Rechargeable batteries cannot be charged in the controller
"How-to" Guides
Customising the RGB
- The colour of the stick LEDs can be adjusted or set to Off
- Press down and hold both sticks at the same time to cycle through different colour settings
- At the end of the cycle, the LEDs will power off
- Pressing down on both sticks again will restart the colour cycle
Programming Turbo Functions
- Turbo mode: The programmed button is set to continuously activate only while pressed
- Turbo Hold mode: The programmed button continuously activates without being pressed
- The following buttons can be set to Turbo or Turbo Hold mode: A, B, X, Y, Left Bumper, Left Trigger, Right Bumper, Right Trigger
For detailed "how to" guide, please find Product Manual